
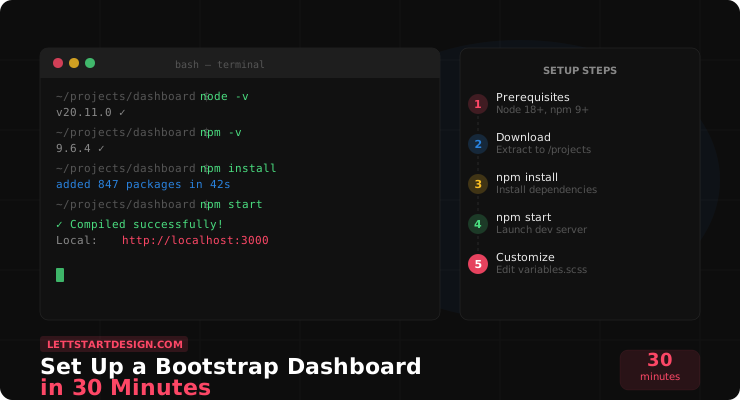
The most common setup mistake I see is developers skipping the prerequisites section of the documentation entirely. They start immediately, hit errors twenty minutes in, and lose time they didn't need to lose — usually because they're running an incompatible version of Node.js or missing a required tool. Read the prerequisites first. Everything else is straightforward.
From experience: Setting up a Bootstrap admin dashboard template should not take longer than 30 minutes. But it often does — and the reason is almost never the template itself. It's the setup environment. Missing a library, wrong Node version, skipping a step in the docs.
This guide walks through the complete setup process for a Bootstrap 5 admin dashboard template, including the specific steps developers most commonly skip and the errors those skips cause. Follow this and you'll have a running dashboard in under half an hour.
The step that trips developers up most consistently is not the SCSS — it's the missing library that prevents the application from starting in the first place. They skip the docs, run npm install, and the app silently fails to start because one required package wasn't listed globally. Always check the documentation's prerequisites section first. It's there for a reason.
Prerequisites — Do This First
Before you touch the template files, verify your environment. This is the step most developers skip — and the one that causes the most lost time.
- Node.js 22 or newer (current LTS) installed — run
node -vto check. If you're on 20 or older, update, and check your template's documentation for the exact version it needs. - npm 10+ or yarn 1.22+ — run
npm -vto confirm - A code editor — VS Code recommended, with the Bootstrap IntelliSense extension
- Git installed — run
git --versionto verify - A modern browser — Chrome or Firefox with DevTools for debugging layout issues
| Tool | Minimum Version | Check Command |
|---|---|---|
| Node.js | 22.x or higher | node -v |
| npm | 10.x or higher | npm -v |
| Git | Any recent version | git --version |
Step 1: Download and Extract the Template
Download and Extract
Download the template ZIP file from LettStartDesign. Once downloaded, extract it to your projects folder — not your desktop, not your downloads folder. Put it somewhere with a clean path and no spaces in the directory name. Spaces in file paths cause obscure errors in some npm scripts that take a while to diagnose.
# Good — clean path, no spaces/Users/yourname/projects/my-dashboard# Avoid — spaces cause path issues in some environments/Users/your name/My Projects/Dashboard Template
Inside the extracted folder you should see a package.json at the root level. If you don't, you've extracted into a subfolder — navigate one level deeper until you find it.
Step 2: Install Dependencies
Install npm Packages
Open your terminal, navigate to the template folder, and run the install command. This is where developers who skipped the prerequisites section hit their first errors — incompatible Node version, missing global packages, or npm permission issues.
# Navigate to the template foldercd /path/to/your/dashboard-template# Install all dependenciesnpm install
This will install everything listed in package.json — Bootstrap, SCSS compiler, any JavaScript plugins, and the build tools. It takes 2–4 minutes depending on your connection speed.
added 847 packages when it's done.Step 3: Run the Development Server
Start the Dev Server
Once dependencies are installed, start the development server. The exact command depends on the template — check your package.json scripts section, but it's almost always one of these:
# Most common — check your package.json to confirmnpm start# Or for SCSS-only templatesnpm run dev# Or gulp-based templatesnpm run gulp
Your browser should open automatically at http://localhost:3000 or http://localhost:8080. If it doesn't, open it manually — the terminal output will tell you which port it's running on.
While the server is running, any change you make to an HTML page or SCSS file will trigger an automatic recompile and browser refresh. This is the live reload feature — you don't need to manually refresh the browser every time you make a change. If live reload stops working mid-session, restart the dev server with Ctrl+C followed by npm start again.
Step 4: Understand the Folder Structure
Know Where Everything Lives
Before you start customizing, spend five minutes understanding the folder structure. This prevents the most common customization mistake — editing compiled files instead of source files and then wondering why your changes disappear when you rebuild.
dashboard-template/
├── src/                  # Source files — edit these
│   ├── scss/             # SCSS source — your styling goes here
│   │   ├── variables.scss  # Colors, fonts, spacing
│   │   └── main.scss     # Main stylesheet imports
│   └── js/               # JavaScript source files
├── dist/                 # Compiled output — don't edit directly
│   ├── css/              # Compiled CSS (auto-generated)
│   └── js/               # Compiled JS (auto-generated)
├── pages/                # HTML page files
└── package.json          # Dependencies and scripts
The rule: always edit source files in src/, never in dist/. The build process overwrites dist/ automatically. Any changes you make directly in dist/ will be lost on the next build.
The pages/ folder is where your HTML files live. Each page corresponds to a screen in the dashboard — the main dashboard view, analytics, user management, login, and so on. When adding a new page to your project, duplicate the closest existing page as a starting point rather than creating one from scratch. The navigation, header, and sidebar are already wired up in each page file — duplicating saves you from reconnecting all of that manually.
One more thing worth checking early: the package.json scripts section. Open it and read through the available commands — there's usually a build script for production output, a watch script for SCSS-only compilation, and sometimes a lint script for code quality checks. Knowing these exist before you need them saves time later.
Step 5: Customize Colors and Branding
Update Brand Colors and Fonts
Open src/scss/variables.scss — this is where all design tokens live. Changing your primary color, sidebar background, font family, and spacing system all happens here. One file, clean changes, no hunting through thousands of lines of CSS.
// src/scss/variables.scss// Primary brand color — change this first$primary: #fd4766;// Sidebar colors$sidebar-bg: #0d0d0d; $sidebar-text: #e8e8e8;// Typography$font-family-base: 'Inter', sans-serif; $font-size-base: 0.9375rem;
Save the file and your dev server will automatically recompile the SCSS and refresh the browser. You should see your brand colors applied across the entire dashboard instantly.
client-variables.scss file that imports the base variables and only overrides what changes per client. This keeps the base template clean and makes switching between client projects much faster.Common Errors and How to Fix Them
Error: Charts Not Rendering
Usually caused by a missing chart library. Check package.json — if ApexCharts or Chart.js is listed, run npm install again to confirm all packages installed correctly. Then check the browser console for a specific error message pointing to the missing file.
Error: Cannot Find Module 'X'
A required library wasn't installed. Run npm install package-name where package-name matches whatever the error message references. This happens most often when developers skip the documentation and miss a global dependency that needs separate installation.
Error: SCSS Compilation Failed
Usually a syntax error in a file you've edited — a missing semicolon, an unclosed bracket, or a variable reference to something that doesn't exist. The terminal error message will include a line number. Go to that line in the SCSS file and look for the issue.
Error: Port Already in Use
npm start -- --port 3001Another process is running on the default port. Either stop that process or start the dev server on a different port as shown above.
Sidebar Not Appearing on Mobile
Check that all JavaScript files compiled correctly — run npm run build and look for errors in the terminal. Sidebar toggle functionality depends on specific JS initialization that can fail silently if a dependency is missing.
Error: Changes Not Reflecting in Browser
This usually means you're editing files in dist/ instead of src/ — the build process overwrites dist/ on every save, wiping your changes. Move your edits to the correct source file in src/scss/ or src/js/ and the live reload will pick them up automatically. If you're editing the right files and still not seeing changes, stop and restart the dev server — sometimes the watcher process gets stuck after a compilation error.
Error: Images or Fonts Not Loading
Usually a path issue. Bootstrap templates use relative paths for assets — if you've moved files around or changed the folder structure, image and font paths in the HTML and SCSS will break. Check the browser's Network tab in DevTools for 404 errors on specific assets, then trace back to the file that references them and update the path. The safest approach is to keep the original folder structure intact and only add files rather than moving existing ones.
Final Thoughts
Setting up a Bootstrap admin dashboard is genuinely a 30-minute task — but only if you don't skip the prerequisites check. That single step eliminates 80% of the setup errors developers encounter. Everything after that is straightforward: install, run, understand the structure, customize the variables.
If you are looking for a Bootstrap admin dashboard template that is free to start with, our Marvel Free dashboard is a good starting point (free templates come without support) — and our Marvel Angular premium is where to go when your project outgrows the basics.
Browse the full admin dashboard templates collection or get in touch if you need help getting set up.
Get a Bootstrap Dashboard Running Today
Download Marvel Free — clean code, SCSS source files, and no setup headaches.
Download Free Dashboard →